Learn how to ruck properly with this comprehensive guide. From the to the , , and , you’ll master the art of rucking and prevent injuries along the way.
The Benefits of Rucking
Rucking is a low-impact exercise that can provide numerous to your physical and mental health. Whether you’re an athlete looking to improve your performance, or just someone trying to stay active, rucking can help you achieve your fitness goals. Here are some of the key of rucking:
Builds Strength and Endurance
Rucking can help you build both strength and endurance. Carrying a weighted rucksack on your back engages your muscles in a way that can help you build lean muscle mass over time. This can improve your overall strength and power, making it easier to perform other exercises and activities.
In addition, rucking is a great way to build endurance. Walking with a weighted pack on your back can help you improve your cardiovascular fitness, making it easier to perform other endurance-based activities like running, biking or swimming. As you become more comfortable with rucking, you can gradually increase the weight of your pack to continue challenging yourself and building your endurance.
Burns Calories and Promotes Weight Loss
Rucking is also an effective way to burn calories and promote weight loss. Walking with a weighted pack on your back requires more energy than walking without a pack, which means you’ll burn more calories in the process. In fact, studies have shown that rucking can burn up to 50% more calories than regular walking.

In addition, rucking can help you lose weight by increasing your overall daily activity level. By incorporating rucking into your routine, you’ll be adding more movement to your day, which can help you burn more calories and ultimately lose weight.
Reduces Stress and Boosts Mental Health
Finally, rucking can be a great way to reduce stress and boost your mental health. Walking in nature with a weighted pack on your back can be a meditative experience that allows you to clear your mind and focus on the present moment. This can be especially beneficial for people who struggle with anxiety or depression.
In addition, rucking can help you build confidence and mental toughness. Pushing yourself to walk longer distances or carry heavier loads can help you develop resilience and perseverance, which can translate into other areas of your life. Overall, is a great way to improve your physical and mental health, and it’s a fun and challenging activity that can be done almost anywhere.
Essential Gear for Rucking
Rucking is a low-cost workout that can be done anywhere, but there are a few essential items you need to have to make your rucking experience more comfortable and effective.
Rucksack Selection and Size
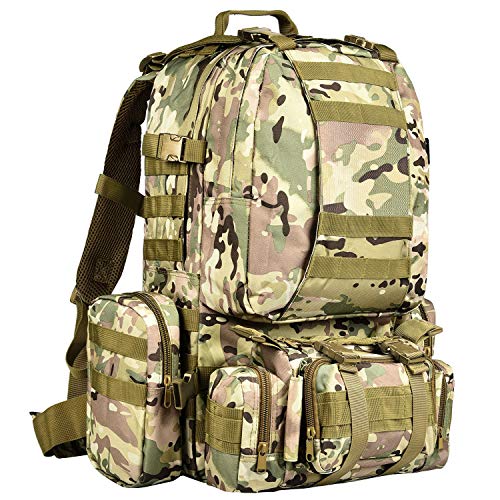
The most important piece of you need for is a sturdy and comfortable rucksack. A rucksack is a backpack designed to carry heavy loads and distribute the weight evenly on your back. When selecting a rucksack, consider the following factors:

- Size: The size of the rucksack you choose should depend on the weight of the load you plan to carry. The most common rucksack sizes for rucking are 20L, 30L, and 40L. If you’re just starting with , a 20L rucksack should suffice. As you progress, you can increase the size of your rucksack.
- Comfort: Your rucksack should fit comfortably on your back and have padded straps to prevent chafing. Look for a rucksack with a waist belt to distribute the weight onto your hips.
- Durability: Your rucksack should be made of sturdy materials that can withstand the rigors of rucking. Look for a rucksack made of nylon or canvas.
Proper Footwear and Socks
The second most important piece of for rucking is proper footwear. You need shoes that provide adequate support and cushioning to protect your feet and joints from the impact of carrying heavy loads. When selecting footwear for rucking, consider the following factors:
- Fit: Your shoes should fit snugly but not too tight. Look for shoes with a wide toe box to allow your toes to spread out naturally.
- Support: Your shoes should provide adequate support for your feet and ankles. Look for shoes with a sturdy sole and good arch support.
- Cushioning: Your shoes should have adequate cushioning to protect your feet from the impact of carrying heavy loads.
In addition to proper footwear, you also need to wear the right socks. Look for socks made of moisture-wicking materials that can keep your feet dry and prevent blisters.
Clothing and Accessories
When it comes to clothing for rucking, comfort and functionality are key. You want clothes that allow you to move freely and wick away sweat. Here are some clothing and accessories you may need for rucking:
- Moisture-wicking shirt: A shirt made of moisture-wicking material can keep you cool and dry during your rucking workout.
- Compression shorts/pants: Compression shorts or pants can provide extra support for your muscles and help prevent chafing.
- Hat or sunglasses: A hat or sunglasses can protect your eyes and face from the sun.
- Gloves: Gloves can provide extra grip and prevent blisters on your hands.
- Water bottle/hydration system: It’s important to stay hydrated during rucking, so make sure you have a water bottle or hydration system with you.
By investing in the right for , you can make your rucking experience more enjoyable and effective. Remember to choose that is comfortable, durable, and functional, and always prioritize safety.
Preparing for a Ruck
Rucking is a challenging activity that requires preparation to ensure a safe and effective workout. Preparing for a ruck involves setting realistic goals, warming up properly, and ensuring adequate hydration and nutrition.

Setting Realistic Goals
Before starting a ruck, it’s essential to set realistic goals that suit your fitness level and experience. It’s important to start slowly and gradually increase the distance and intensity of your rucks. Setting achievable goals will help you stay motivated and avoid injury. You can use a training log or an app to track your progress and set new goals.
Warm-Up and Stretching Exercises
Warming up before a ruck is essential to prepare your body for the physical demands of the activity. A proper warm-up should include dynamic stretching exercises that increase your heart rate and blood flow to your muscles. Here are some warm-up exercises you can do before a ruck:
- Jumping jacks
- High knees
- Butt kicks
- Lunges
- Arm circles
Stretching after a warm-up and after a ruck is also crucial to prevent injury and improve flexibility. You should focus on stretching your legs, hips, back, and shoulders. Here are some stretching exercises you can do after a ruck:
- Standing quad stretch
- Hamstring stretch
- Hip flexor stretch
- Cobra stretch for the back
- Shoulder stretch
Hydration and Nutrition
Proper hydration and nutrition are crucial for a successful ruck. You should drink plenty of water before, during, and after a ruck to prevent dehydration. It’s also essential to eat a balanced meal that includes carbohydrates, protein, and healthy fats before a ruck to provide your body with energy. Here are some hydration and nutrition tips for :
- Drink at least 16 ounces of water 2 hours before your ruck.
- Bring a water bottle or a hydration pack with you during your ruck and drink every 10-15 minutes.
- Eat a balanced meal that includes carbohydrates, protein, and healthy fats 2-3 hours before your ruck.
- Bring a snack that is easy to digest, such as a granola bar or a banana, to eat during your ruck if needed.
- Refuel with a protein-rich meal after your ruck to aid in muscle recovery.
In summary, preparing for a ruck involves setting realistic goals, warming up properly, and ensuring adequate hydration and nutrition. By following these tips, you can have a safe and effective ruck that will help you achieve your fitness goals.

How to Ruck Properly
Rucking is a fantastic exercise that can help you build strength, burn calories, and improve your overall fitness. However, like any physical activity, it’s important to do it correctly to avoid injury and get the most out of your workout. Here are some tips on how to ruck properly:
Posture and Form
Maintaining proper posture and form is essential when rucking. This means standing up straight, keeping your shoulders back and down, and engaging your core muscles. Your rucksack should be centered on your back and held close to your body to avoid strain on your back and shoulders. When walking, take small steps and land on the balls of your feet to reduce impact on your joints.
Breathing Techniques
Proper breathing is crucial when rucking. It’s important to breathe deeply and slowly, inhaling through your nose and exhaling through your mouth. This will help you maintain a steady pace and avoid getting winded. You can also try breathing in rhythm with your steps, inhaling for two or three steps and exhaling for the same number of steps.
Pacing and Intensity
When starting out, it’s important to set a moderate pace that you can maintain for the duration of your ruck. As you get more comfortable, you can increase the intensity by adding weight to your rucksack or increasing your speed. However, it’s important not to overdo it and risk injury. A good rule of thumb is to increase your intensity by no more than 10% each week.
Rucking Workouts for Beginners
If you’re new to , it’s important to start with a basic training plan that gradually increases in intensity. This will help you build strength and endurance while minimizing the risk of injury.
Basic Ruck Training Plan
A basic ruck training plan should consist of regular ruck walks at a moderate pace. This will help you build endurance and prepare your body for more intense .
Here’s an example of a basic ruck training plan:
- Week 1: Ruck walk for 20-30 minutes, 2-3 times per week
- Week 2: Ruck walk for 30-40 minutes, 2-3 times per week
- Week 3: Ruck walk for 40-50 minutes, 2-3 times per week
- Week 4: Ruck walk for 50-60 minutes, 2-3 times per week
As you progress through the weeks, gradually increase the weight of your rucksack. Start with a weight that feels comfortable and gradually increase it over time.
Interval Rucking Workouts
Interval rucking can help you build strength and endurance while also burning calories. Here’s an example of an interval rucking workout:
- Warm up with a 5-10 minute ruck walk at a moderate pace
- Ruck for 1 minute at a fast pace, then rest for 1 minute
- Ruck for 2 minutes at a fast pace, then rest for 1 minute
- Ruck for 3 minutes at a fast pace, then rest for 1 minute
- Ruck for 4 minutes at a fast pace, then rest for 1 minute
- Ruck for 5 minutes at a fast pace, then rest for 1 minute
- Cool down with a 5-10 minute ruck walk at a moderate pace
Repeat this workout 2-3 times per week, gradually increasing the weight of your rucksack as you progress.
Hills and Stairs Rucking
Hills and stairs can add an extra challenge to your rucking , helping you build strength and endurance. Here’s an example of a hills and stairs rucking workout:
- Warm up with a 5-10 minute ruck walk at a moderate pace
- Ruck up a hill or stairs for 1-2 minutes at a moderate pace, then rest for 1 minute
- Repeat this for 10-15 minutes
- Cool down with a 5-10 minute ruck walk at a moderate pace
Repeat this workout 2-3 times per week, gradually increasing the incline and weight of your rucksack as you progress. Remember to take it slow and listen to your body to avoid injury.
Advanced Rucking Techniques
Rucking is a versatile form of exercise that can be modified to suit different fitness levels and goals. If you’re looking to take your to the next level, consider incorporating some advanced into your routine.
Sandbag Rucking
One way to add intensity to your ruck is to use a sandbag. Sandbag rucking involves carrying a heavy sandbag in your rucksack, which adds an extra challenge to your training. Not only does this increase the weight you’re carrying, but it also makes the load less stable, which requires you to engage your core and stabilizer muscles to maintain proper form.
To get started with sandbag , you’ll need a sturdy sandbag and a rucksack that can accommodate it. Fill the sandbag with sand or other heavy materials, then place it in your rucksack and adjust the straps to secure it in place. Start with a lighter weight and gradually increase as you become more comfortable with the added challenge.
Team Rucking and Challenges
Rucking alone can be a great way to clear your mind and focus on your goals, but rucking with a team can add a new level of motivation and camaraderie. Team rucking involves working together with a group of people to complete a ruck workout or challenge.
There are many types of team rucking challenges, ranging from timed events to obstacle courses to long-distance marches. Participating in a team rucking event can be a fun and rewarding way to push yourself to your limits and bond with your fellow ruckers.
Ruck Running and Speed Training
Rucking doesn’t have to be a slow, steady march. In fact, incorporating running into your ruck can be a great way to improve your cardiovascular fitness and increase your speed and endurance.
Ruck running involves jogging or running with a rucksack on your back. To get started, choose a rucksack that fits snugly and won’t bounce around as you run. Start with short intervals of running and gradually increase your speed and distance as you build your fitness.
Another way to incorporate speed training into your ruck is to do interval training. This involves alternating periods of high-intensity exercise with periods of rest or lower-intensity exercise. For example, you might do a 30-second sprint followed by a 1-minute walk, then repeat for several cycles.
Remember to always listen to your body and progress at a pace that feels comfortable for you. With these advanced rucking , you can take your ruck to the next level and reach your fitness goals.
Recovery and Injury Prevention
Rucking is an excellent form of exercise that helps you build strength, endurance, and mental toughness. However, like any physical activity, it can lead to injuries if not done properly. To prevent injuries and recover faster, it’s essential to take care of your body after a rucking session. In this section, we’ll discuss some of the best recovery and injury prevention for ruckers.
Cooling Down and Stretching
Cooling down after a rucking session is crucial to prevent muscle soreness and stiffness. It helps your body gradually return to its normal state and reduces the risk of injury. A good cool-down routine should include gentle exercises like walking or jogging at a slower pace, followed by stretching exercises. Stretching helps improve flexibility, reduces muscle tension, and increases blood flow to your muscles. Here are some stretching exercises you can do after a rucking session:
- Hamstring stretch: Sit on the ground and extend your legs in front of you. Reach for your toes and hold for 30 seconds.
- Quad stretch: Stand on one foot and bend the other leg behind you. Grab your ankle and pull it towards your buttocks. Hold for 30 seconds and repeat on the other side.
- Hip flexor stretch: Kneel on the ground with one leg in front of you and the other leg behind you. Lean forward and push your hips towards the ground. Hold for 30 seconds and repeat on the other side.
- Shoulder stretch: Stand with your feet shoulder-width apart and reach your arms behind your back. Clasp your hands together and lift your arms as high as possible. Hold for 30 seconds.
Self-Massage and Foam Rolling
Self-massage and foam rolling are effective to relieve muscle tension and soreness after a rucking session. They help break down scar tissue and knots in your muscles, improve blood circulation, and enhance your range of motion. Here are some self-massage and foam rolling exercises you can do:
- Foam rolling your quads: Lie face down on the floor and place a foam roller under your thighs. Roll back and forth from your hips to your knees for 30 seconds.
- Self-massage your calves: Sit on the floor with one leg extended in front of you. Use your hands or a massage ball to apply pressure to your calf muscles. Move your hands or the ball up and down your calf for 30 seconds and then switch legs.
- Foam rolling your back: Lie on your back with a foam roller under your shoulder blades. Lift your hips off the ground and roll back and forth from your shoulder blades to your lower back for 30 seconds.
Common Rucking Injuries and How to Prevent Them
Rucking can put a lot of stress on your body, especially if you’re not used to it or if you’re carrying a heavy load. Here are some common injuries and how to prevent them:
- Blisters: Blisters are caused by friction between your skin and your shoes or socks. To prevent blisters, wear moisture-wicking socks that fit well and use a lubricant like petroleum jelly on areas prone to blisters.
- Shin splints: Shin splints are caused by overuse and can be prevented by wearing proper footwear, stretching before and after , and gradually increasing your distance and intensity.
- Knee pain: Knee pain can be caused by overuse, improper form, or lack of strength. To prevent knee pain, wear proper footwear, use proper form, strengthen your leg muscles, and stretch before and after rucking.
- Lower back pain: Lower back pain can be caused by improper form or a heavy load. To prevent lower back pain, use proper form, strengthen your core muscles, and gradually increase your load.
In conclusion, recovery and injury prevention are crucial aspects of rucking that should not be overlooked. By following the tips and discussed in this section, you can reduce your risk of injury, recover faster, and enjoy the of rucking for years to come.